PHOTOGRAMS
HOW TO MAKE A PHOTOGRAM:
-First set the enlarger at F11 and raise or lower the enlarger to focus the light and in order to get the light the same size as your paper
-Then set your timer to as many seconds as you want to expose your paper for, long is darker
-Turn off the light on the enlarger as not to expose your paper before the objects are on it and place your photographic paper where the light is with the shiny side of the paper shining up
-Set up a mixture of opaque, transparent, and interestingly shaped objects onto the paper.
-using a piece of cardboard cover up 2/3rds of the paper and expose it to the light for 3 seconds
-After that move the cardboard over to cover up 1/3rd of the paper and expose for another 3 seconds
-Then expose the whole paper for the final 3 seconds
-Now put the paper into the developer, ensuring it stays fully under for 2 minutes
-Let it drip off then place it into the stop for 1 minute
-Then into the fixer for 4 minutes
-After that put it into the wash for 5 minutes then into the dryer and your photogram is ready and you can decide what time you like best from the different sections of your photogram
FIRST RESPONSE:
|
|
WWW:
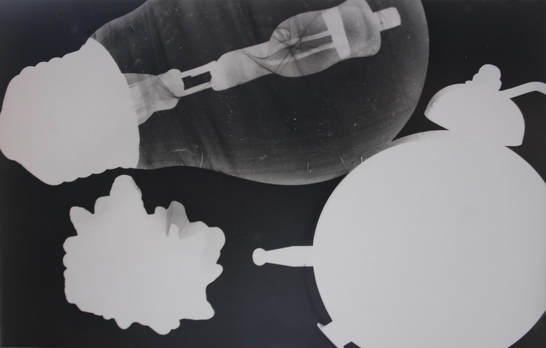
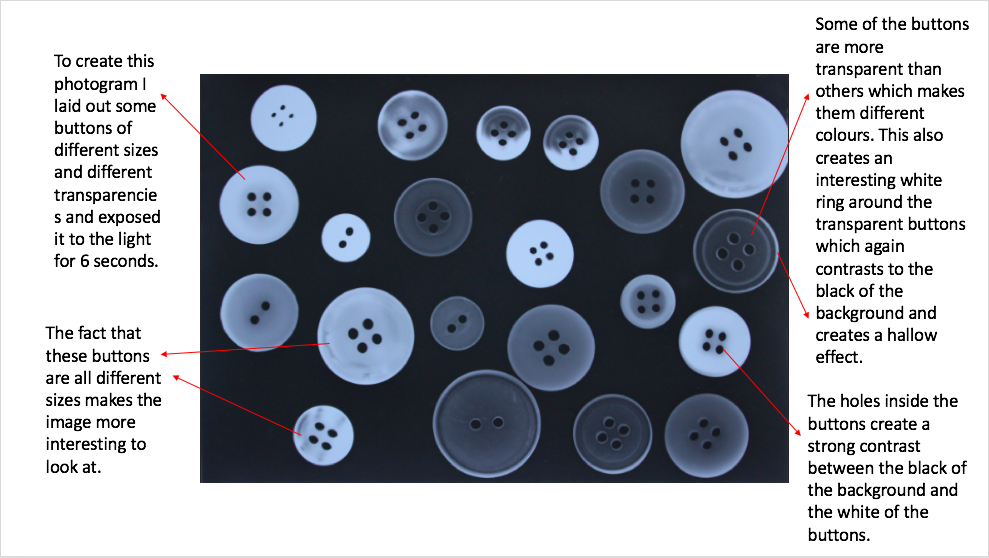
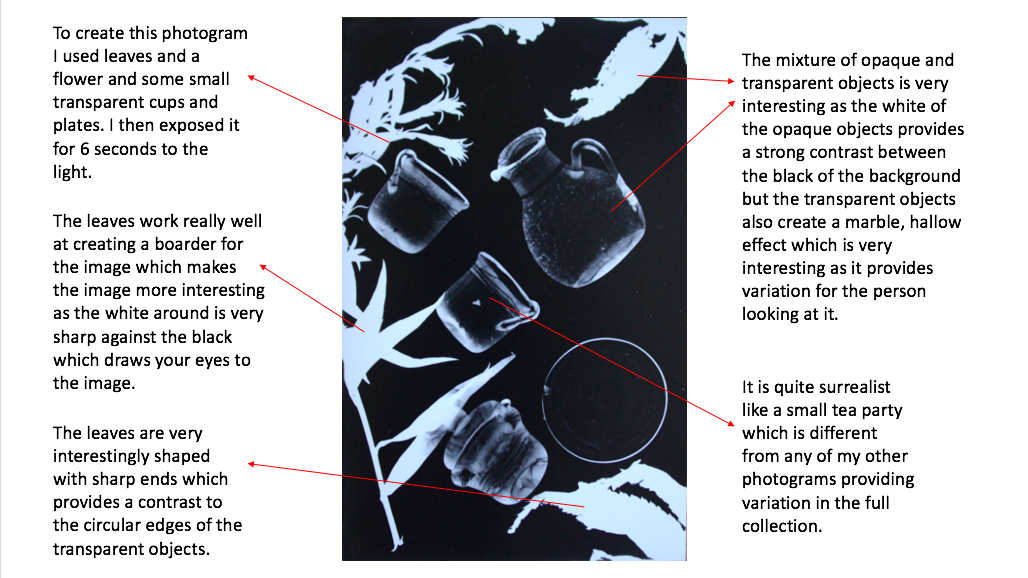
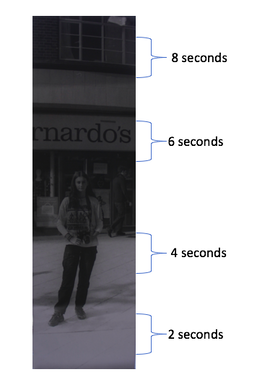
In my second photogram I chose to lay out the light bulb as the key feature with opaque objects on the side which was very effective. I also chose to expose the image for 6 seconds at F11 as it clearly showed the differentiation between the opaque and transparent objects but also to get the right shade as it is not too dark on the paper but allows the transparent objects to contrast to the black behind them and the white of the opaque objects as well.
EBI:
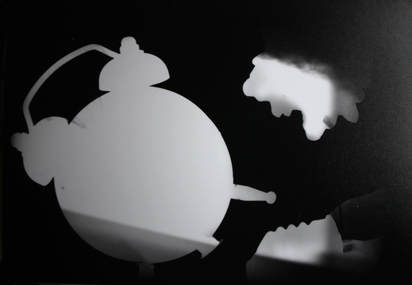
In my first photogram, I didn't have any opaque objects in it and the objects weren't placed in very interesting angles. The section that was exposed for 9 seconds was very dark and the section of the image exposed for 3 seconds was very light.
In my second photogram I chose to lay out the light bulb as the key feature with opaque objects on the side which was very effective. I also chose to expose the image for 6 seconds at F11 as it clearly showed the differentiation between the opaque and transparent objects but also to get the right shade as it is not too dark on the paper but allows the transparent objects to contrast to the black behind them and the white of the opaque objects as well.
EBI:
In my first photogram, I didn't have any opaque objects in it and the objects weren't placed in very interesting angles. The section that was exposed for 9 seconds was very dark and the section of the image exposed for 3 seconds was very light.
SECOND RESPONSE:


WWW:
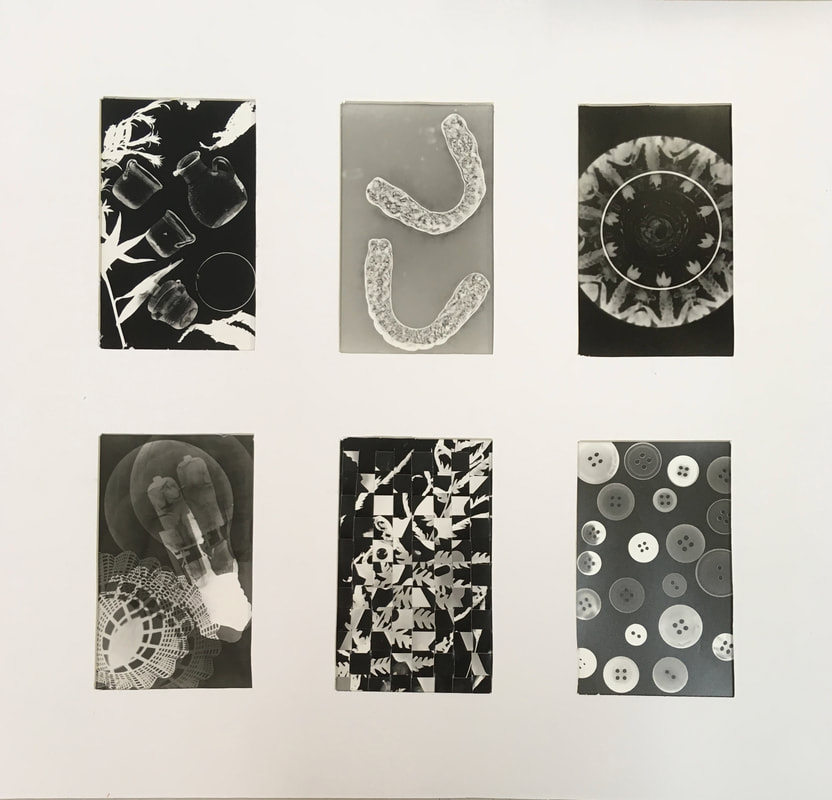
I used a variety of techniques in these photograms. The contrast between the black and white in the images are also effective to create variety in the image but also to catch your eye. There is a mixture of transparent and opaque objects within each of the images so they are interesting to look at individually but also between the collection. I used different exposures on each one so they work together to contrast between them as they are different severities of black on the background. Each one seems to have frame or border of either an object or a black strip which makes them look sleek and striking.
EBI:
I wanted to try create the halo effect around the object through double exposure but unfortunately it didn't work. I also could have tried out different exposures of each to see what worked best with the objects instead of just sticking with what it came out like. I could have thought more about how the length of the cut strips in the weaved image to see what would have looked the most effective.
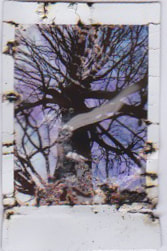
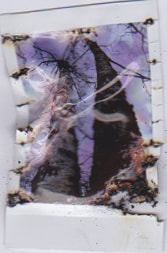
FINAL PHOTOGRAMS
PIN HOLE CAMERA'S
TO MAKE A PINHOLE CAMERA:
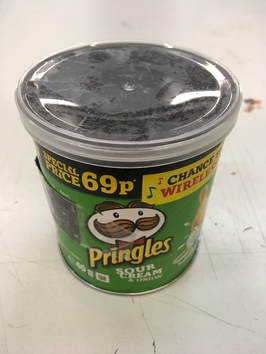
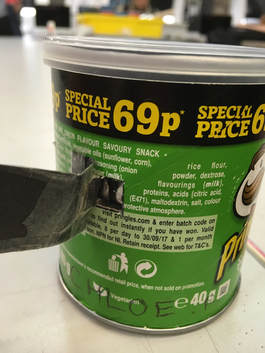
-First get a small Pringle tin
-Then we covered the inside of the tin and the lid fully with black paper.
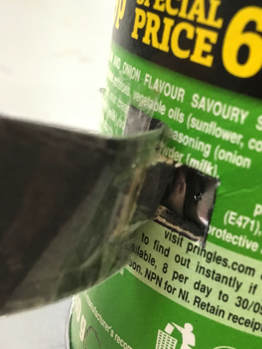
-After that measure out a 10mm by 10mm square on the side in the middle.
-Then we cut out three of the sides of the square and using a scalpel leaving one side to create a flap.
-Then we cut out a square of aluminium foil big enough to completely cover up the flap and celetaped it onto the inside covering the flap after that we got another piece of black paper and celetaped it to the flap of the outside to seal the hole completely ensuring no light to go through it.
-First get a small Pringle tin
-Then we covered the inside of the tin and the lid fully with black paper.
-After that measure out a 10mm by 10mm square on the side in the middle.
-Then we cut out three of the sides of the square and using a scalpel leaving one side to create a flap.
-Then we cut out a square of aluminium foil big enough to completely cover up the flap and celetaped it onto the inside covering the flap after that we got another piece of black paper and celetaped it to the flap of the outside to seal the hole completely ensuring no light to go through it.
|
|
|
|
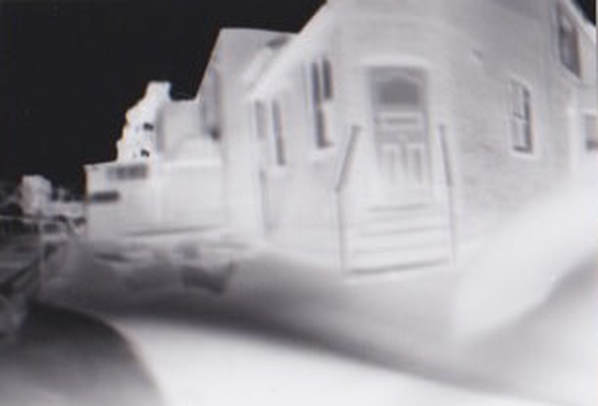
TO CREATE THE NEGATIVE IMAGES:
-First put some photographic paper into your pinhole camera opposite your hole inside the dark room as not to expose the paper.
-Then go to the place you want to take the image and open up the flap. Expose it for 15-20 seconds depending on how bright the day is or the room your in is.
-Go back to the dark room again before opening it up and start developing your image in the developer then stop then fixer then wash.
-After that to make it into a positive image place down your negative under the enlarger, then put another piece of photographic paper on top of it placing a piece of glass over that to ensure it stays flat
-Expose it to the light for 3-6 seconds
-Then develop, stop, fix and wash the plain paper to see your positive image.
TO MAKE THE POSITIVE IMAGES:
-First place down your negative under the enlarger, then put another piece of photographic paper on top of it placing a piece of glass over that to ensure it stays flat
-Expose it to the light for 3-6 seconds
-Then develop, stop, fix and wash the plain paper to see your positive image.
-First place down your negative under the enlarger, then put another piece of photographic paper on top of it placing a piece of glass over that to ensure it stays flat
-Expose it to the light for 3-6 seconds
-Then develop, stop, fix and wash the plain paper to see your positive image.
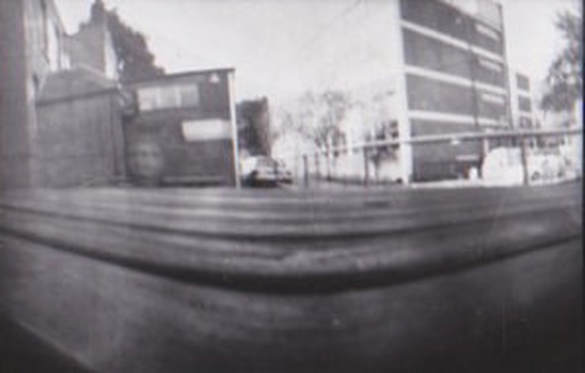
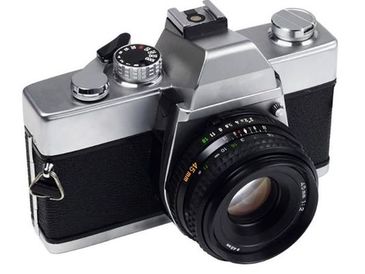
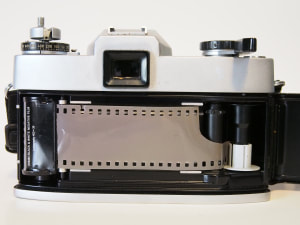
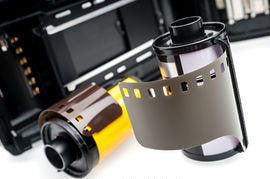
FILM CAMERAS
|
|
TO TAKE THE IMAGES ON THE FILM CAMERA:
First load the film camera with a roll of film with 24 photos on them by slotting the the film into the inside and pulling the film across before closing the camera ensuring the film is not exposed to the light
Then take the images by focusing in and changing around the aperture and switching the photo the leaver each time until you have taken all the images you want
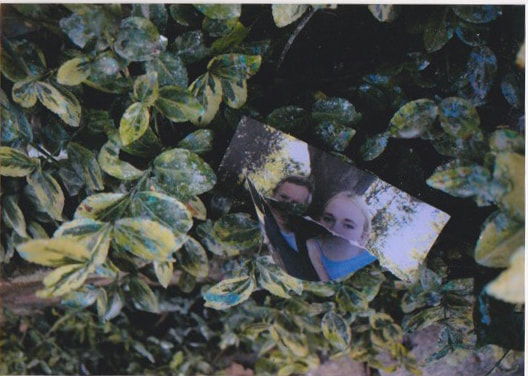
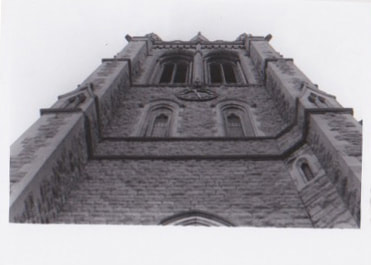
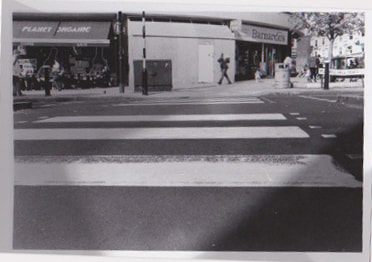
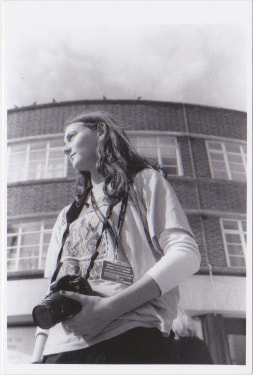
we took a close up, reflection, shadow, low angle, far away portrait
Then wind up the the film to make sure it is all rolled up and none will be exposed when you open the camera
Then open the camera up and pull out the film
First load the film camera with a roll of film with 24 photos on them by slotting the the film into the inside and pulling the film across before closing the camera ensuring the film is not exposed to the light
Then take the images by focusing in and changing around the aperture and switching the photo the leaver each time until you have taken all the images you want
we took a close up, reflection, shadow, low angle, far away portrait
Then wind up the the film to make sure it is all rolled up and none will be exposed when you open the camera
Then open the camera up and pull out the film
|
|
TO DEVELOP YOUR FILM:
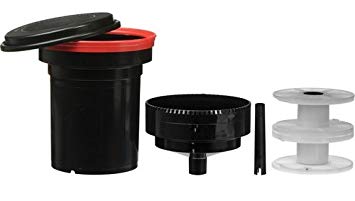
First go into a pitch black room with a developer tank, column, reel and hat.
Then take about an index finger length off the bottom and making the edge straight
Then wind the film onto the reel by putting it in where the arrows are then with your palm turning the reel back and forth
Then place it on the column and into the tank ensuring the hat and lid are on top before bringing it into the light.
After that mix the film developer and pour it into the tank for 6.5 minutes swirling the tar and banging it against a surface every minute
Then pour it out and pour in the stop for 30 seconds and pour in the fix for 5 minutes swirling and banging every minute
Then fill tank with water allowing it to keep overflowing for 5 minutes
then pour about a drop of film rinse into the water left and urge the film in and out of the water a few times before taking it out, unravelling it from the reel, getting excess water off it and hanging it up in the dryer.
once it is dry, your film is ready to be enlarged.
|
|
TO ENLARGE YOUR IMAGES:
First pull out the slide off your enlarger
then place your film into the slide with the shiny side up and upside down
The put the light on to adjust the image to 5 by 4 and make the image focused
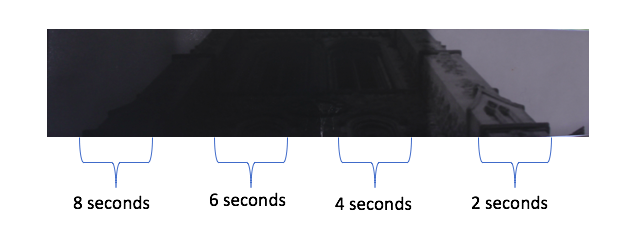
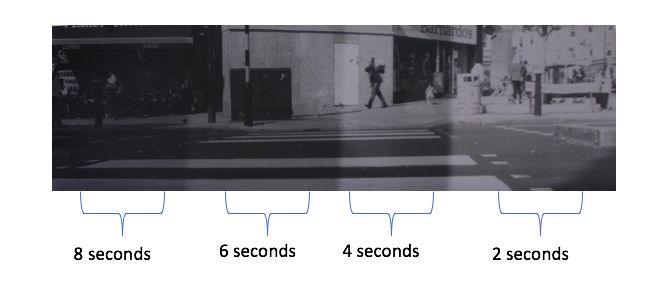
First do a test strip
Then get a piece of photographic paper and expose the image in order to print it onto the paper
After that develop, stop, fix and dry
First pull out the slide off your enlarger
then place your film into the slide with the shiny side up and upside down
The put the light on to adjust the image to 5 by 4 and make the image focused
First do a test strip
Then get a piece of photographic paper and expose the image in order to print it onto the paper
After that develop, stop, fix and dry
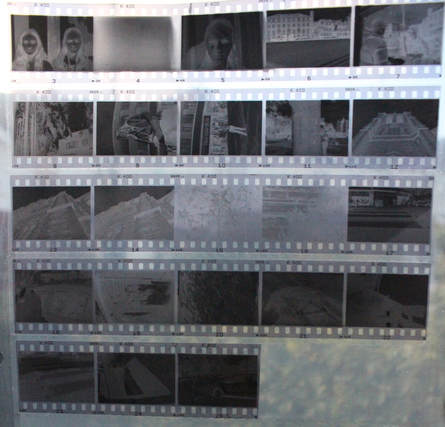
Contact Sheet:

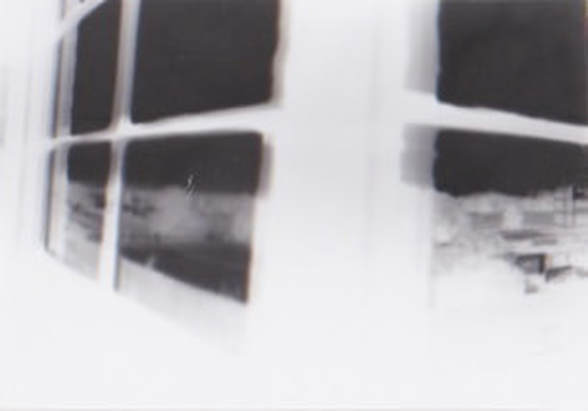
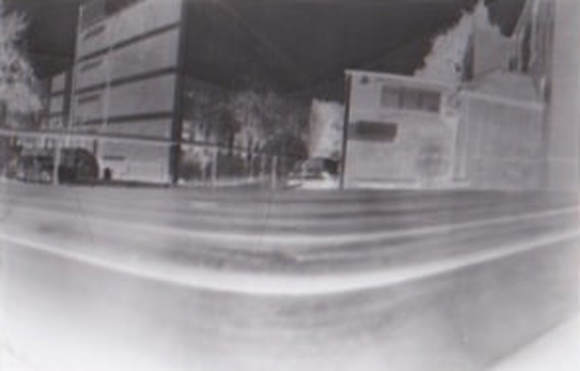
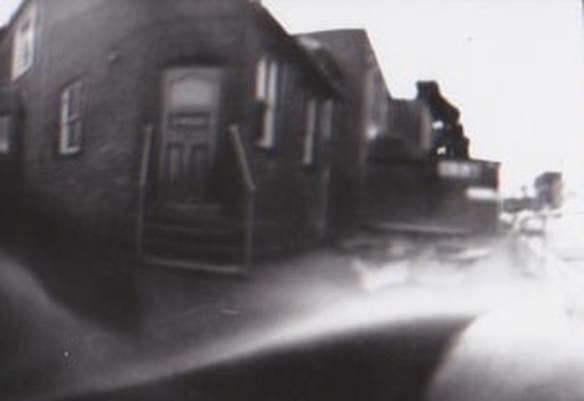
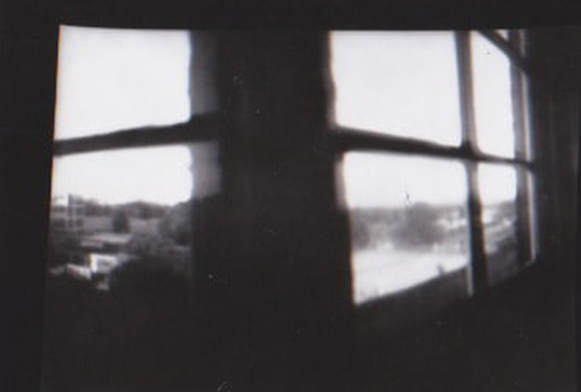
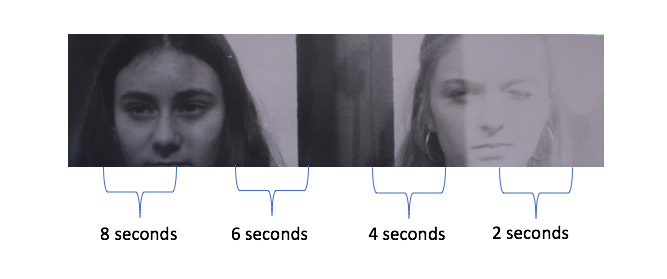
ENLARGEMENTS:
|

|
|
|
|
|

|
|
|
|
